Rpanion-server 0.10.0 User Manual
This page describes how to use Rpanion-server version 0.10.0.
The installation instructions can be found at the main Rpanion-server page
This manual assumes that Rpanion-server is up and running at http://10.0.2.100:3000.
Features
Rpanion-server assists and automates the managing of commonly used functions of a Companion Computer.
This includes network configuration for Wifi and wired networks, low latency video streaming, NTRIP streaming, MAVLink telemetry streaming and tlog/binlog management. It is all managed from a Web based GUI.
New in this version
- Add support for Node.js 18 and 20
- Migrate to libcamera API on the Raspberry Pi
- Add support for 2nd CSI port on Raspberry Pi
- Hardware x264 encoding for USB cameras
- Reduced x264 latency
- Add support for Jetson CSI cameras
- Add option to send datastream requests
- Better UI consistency
- Improved Wireguard status
- Various bug fixes in Network page
- Add (limited) support for Ubuntu 22 on Raspberry Pi. Video not supported.
- Added support for Le Potato SBC
- Added support for alternate serial ports on Raspberry Pi 4
Screens
Network
The Network page allows the companion computer's network settings to be viewed and changed. This includes both Wi-Fi and wired (Ethernet) based connections.
Network management is done on an adaptor (hardware device) and connection (collection of network settings) basis. Each adaptor can have one connection active at a time.
Connections for an adaptor can be added, edited or deleted via the named buttons. When adding Wi-Fi connections, a list of available networks will be shown. Click on the desired Wi-Fi network on the list to pre-fill it's details.
Connections can be shared across adaptor of the same type (i.e. Wi-Fi) unless the “Attach to specific adaptor” option is used.
When a connection is “Active” that means the adaptor is active and using that connection's settings. Any Web UI connections using that connection will display an error message and the new connection's IP address will need to be used instead.
Settings are saved between reboots.
If debugging of network settings is required, the “nmcli” tool can be used for checking the connections.
To disable all Wi-Fi interfaces (also known as Flight Mode), toggle the “Wi-Fi Interfaces Enabled” button. When disabled, the Wi-Fi connections will not be able to be edited.
Flight Controller
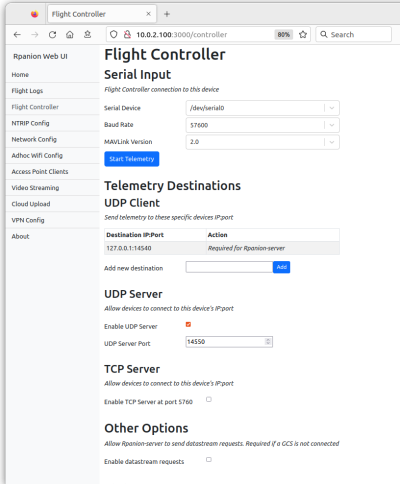
The Flight Controller page controls the telemetry (MAVLink) input and outputs from a connected flight controller.
To enable telemetry from a connected flight controller, ensure the correct device, baudrate and MAVLink version are selected, then click the “Start Telemetry” button. If successful, the “Status” section of the page will show incrementing packet numbers, the vehicle type, firmware type, firmware version and connection state.
Any status text (statustext MAVLink message) from the flight controller will be displayed in the text box marked “Console Output”.
To forward telemetry across a network via UDP, enter the destination in “IP:port” format in the “Add new output” text box, then click “Add”.
To stop telemetry, click the “Stop Telemetry” button. This will also allow the connection settings to be changed.
The connection settings will be saved between reboots.
If desired, telemetry can be output over TCP, using the “Enable TCP Server” option, which will start a TCP server at port 5760 on all network interfaces.
A UDP server is available via the “UDP Server” option. Ground stations can connect to the specified port on all network interfaces.
If a ground station is not connected, the ``Enable datastream requests`` option will trigger the flight controller to send the full telemetry stream at 4Hz.
dtoverlay=pi3-miniuart-bt line may need to be added to /boot/config.txt to have a working telemetry link
Flight Logs
The Flight Logs page manages the telemetry logs (tlogs) and dataflash (bin) logs from the connected flight controller.
If logging is enabled (via the checkbox on the page), Rpanion-server will log all received MAVLink packets to a tlog file. These logs can be downloaded via clicking on the log file name in the table.
Dataflash logs will be logged according to the settings on the flight controller. In ArduPilot, set the LOG_BACKEND_TYPE parameter to use “MAVLink” to enable Dataflash logging to Rpanion-server.
A baud rate of 921600 or higher to the flight controller is recommended. Some (F4-based) flight controllers may struggle with high-rate logging - the ``LOG_BITMASK`` Ardupilot parameter will need to be reduced in some cases.
Rpanion-server will start a new tlog:
- On boot
- When flight telemetry is started on the Flight Controller page
- When the user clicks the “Start new Logfile” button
A logfile can be downloaded via clicking on the logfile name.
To delete all inactive (not currently being used for logging) logfiles, click the “Clear inactive logs” button for each log type.
If desired, KMZ (zipped KML) files can be automatically generated from flight logs via the “Enable” button in the “KMZ files” section. The KMZ files are generated every 20 seconds, based upon the available telemetry logs.
Video Streaming
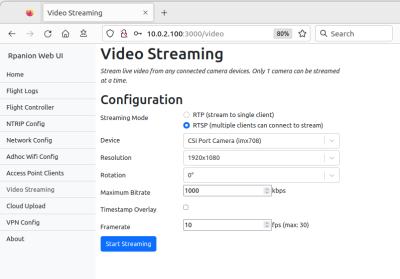
The Video Streaming page controls the ability to stream video from a connected camera to the network via an RTSP or UDP stream.
Any libcamera-supported CSI cameras or any standard USB cameras are supported.
For the video streaming options, Rpanion-server will automatically detect any webcams or the Raspberry Pi camera (if fitted) and query each device for its available resolutions. Options are also given for video rotation and datarate. When running, Rpanion-server will use GStreamer to start an RTSP server and will transmit H.264 compressed video to any connected video clients.
If desired, video can be output over UDP instead (such as for QGroundControl). This will send a H.264 RTP stream to a single destination client, defined by the IP and port.
Connection strings for popular software packages will be shown on the page. If the companion computer is running on multiple networks, ensure the correct IP address is used.
If the selected video device does not natively output H.264, it will automatically be converted and compressed to H.264. On less powerful companion computers, real-time compression may not be possible at higher video resolutions.
Note that only one video device can be streaming at a time.
Note that if VLC is used, there may be up to 2 seconds of video latency. If low latency is required, consider reducing the “caching” option in VLC or using GStreamer instead.
The connection settings will be saved between reboots.
About
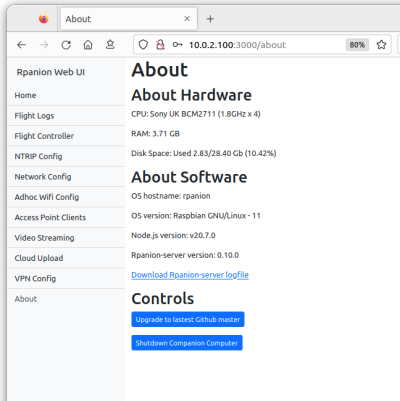
The about page displays high level hardware and software information about the companion computer - including the OS version, node.js version and Rpanion-server version.
The companion computer can be shutdown from here, by clicking the “Shutdown” button.
In the case of the Raspberry Pi, it will also show any connected HAT devices.
For debugging any issues, the Rpanion-server logfile can be downloaded. This will show any errors encountered during operation.
To upgrade to a more recent version of Rpanion-server, the “Upgrade to latest Github Master” button will download and build the latest codebase.
NTRIP Config
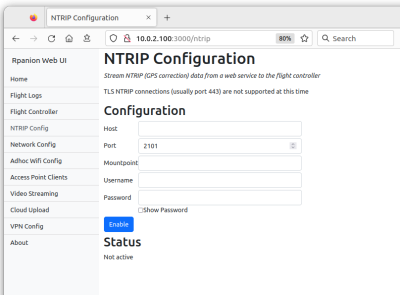
The NTRIP Config page allows the user to stream a web-based NTRIP correction service to the flight controller. This requires that the GPS modules on the flight controller support RTCM input.
The “Status” section will advise if a connection to the NTRIP server was successful and if valid data is being recieved.
The connection settings will be saved between reboots.
Adhoc WiFi Config
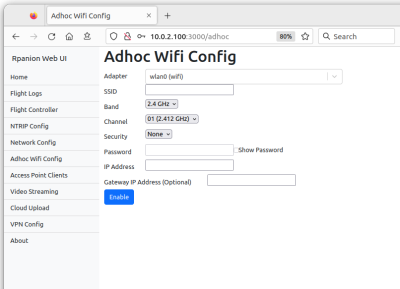
This page allows the user to configure a wireless adapter to use Adhoc“ mode.
Due to the backend software used here (iwconfig), enabling Adhoc mode on an adapter makes it unusable in the Network Config page.
Note that if using WEP security, passwords are limited to 10 or 26 characters. Also note that WEP is considered unsecure.
Access Point Clients
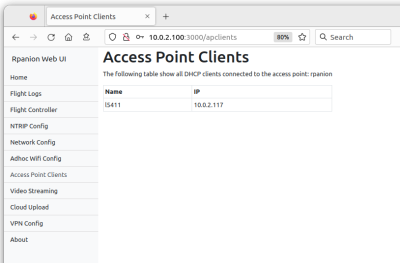
If a wireless adapter on the companion computer is configured to be an AP (Access point), this page will show the name and IP address of all connected clients.
VPN
VPN connections can be activated and deactivated from this page. The Zerotier and Wireguard services are supported.
For Zerotier, the Network ID can be entered or removed.
For Wireguard, the network configuration (.conf) file can be uploaded and the activated or deactivated as required.
The connection settings will be saved between reboots.
Cloud
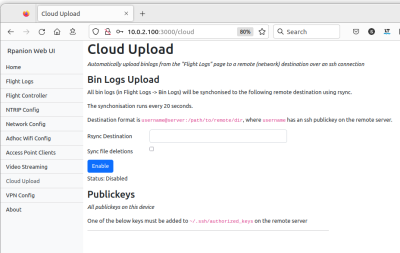
From this section, all bin logs from the “Flight Logs” section can be uploaded to a remote network location via an ssh connection, using rsync.
Files are uploaded every 20 seconds and includes any in-progress logs.
The ssh connection only supports publickey authentication, so the remote location must have one of the listed publickeys loaded.

